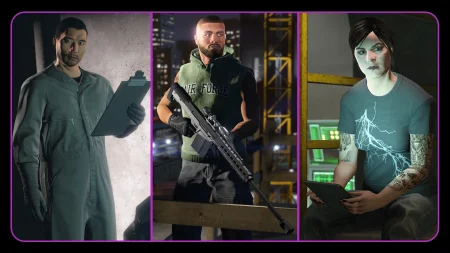

Cayo Perico Solo, in Short: One Player Can Run the Whole Island
Yes — The Cayo Perico Heist can be played completely solo, from intel to escape, and solo is how most players farm it. Rockstar designed it that way at its 15 December 2020 launch, as the first heist playable alone or with up to three other players.
You need one big purchase first: the Kosatka submarine at GTA$2,200,000. After that, each repeat run costs a GTA$100,000 setup fee, and a clean solo finale with a full loot bag is where the money comes from.
At the time of writing, a typical solo run banks roughly GTA$600,000 to GTA$1,200,000 after fees, depending on the target scoped. Payouts were cut most recently in Title Update 1.73 in July 2026, so treat every value below as a current base figure, not a promise.
Key Takeaways
- The Kosatka costs GTA$2,200,000 from Warstock Cache & Carry, and repeat setups cost GTA$100,000 each.
- Primary targets at base value run from Sinsimito Tequila at GTA$400,000 up to the Pink Diamond at GTA$910,000, with Hard Mode adding 10%.
- The Panther Statue at GTA$1,900,000 is the richest target, but it only appears during selected Rockstar events.
- Solo players should fill their one loot bag with cocaine first; compound gold needs two players to reach.
- The Elite Challenge pays GTA$50,000, or GTA$100,000 on Hard Mode, for a finale under 15 minutes with full bags and no failed hack.
- A solo finale triggers a 144-minute cooldown, while a crew finale triggers only 48 minutes.
1. Buying the Kosatka and Starting Your First Run
Start at The Music Locker, under the Diamond Casino. Meet Miguel Madrazo in the VIP area first, because that unlocks the Kosatka for purchase.
Then buy the submarine from Warstock Cache & Carry for GTA$2,200,000. Customisation can push the total to GTA$9,085,000, but none of it is required, so buy the base boat first.
Register as a VIP, CEO or MC President, board the Kosatka and use the planning screen with Pavel. Your first run is a story run with a fixed target, the Madrazo Files, worth GTA$1,100,000, and it teaches you the island layout.
There is no legitimate shortcut around that first investment. Players searching for a free route should read why there is no money cheat in GTA games — Cayo Perico pays well precisely because it is earned through repeatable, legitimate play.
Even with questions open about whether GTA Online progress will carry over to GTA 6, the submarine normally earns its price back within a few successful runs.
2. Gather Intel: Scope Once, Scope Properly
Every run starts with the Gather Intel trip. You arrive as a party guest, slip away from the beach party, and photograph what you find while avoiding guards, because being caught sends you back to the party gate.
Your mandatory stop is the communications tower. Hack the signal box and cycle through the compound cameras until you identify the primary target in El Rubio’s underground vault, since it decides most of your payout.
Next, scope at least one outside loot stop you can reach solo, such as the Main Dock or the airstrip, and note what is on each table. Your finale route should be built around the best table you found.
Also photograph extras near your path: bolt cutters, grappling hooks, guard clothing and the supply truck. Each one recorded becomes an option in the finale.
Most important of all, find the drainage tunnel. Swim or boat behind the compound and dive to the underwater grate on the cliff face below it, because this unlocks the best solo entry point for every future run.
On repeat runs you can scope much faster: the primary target and your chosen loot tables are the priorities.
3. Primary Targets Ranked, From Tequila to Panther
The primary target is randomised each time you scope, and you cannot choose it directly. These are the current base values at the time of writing, after the Title Update 1.73 reductions, with Hard Mode adding 10%.
Sinsimito Tequila pays GTA$400,000, or GTA$440,000 on Hard Mode, and it is the lowest prize. The Ruby Necklace pays GTA$560,000, or GTA$616,000 on Hard Mode, and Bearer Bonds pay GTA$616,000, or GTA$677,600 on Hard Mode.
The Pink Diamond pays GTA$910,000, or GTA$1,001,000 on Hard Mode, and it is the best target in the normal rotation. Above it sits the Panther Statue at GTA$1,900,000, or GTA$2,090,000 on Hard Mode, but it is event-only and cannot be scoped in a normal week.
Target luck follows a weekly pattern in current in-game checks reported by GTA BOOM. On the first scope-out after the Thursday weekly reset, the reported chances are 40% Ruby Necklace, 40% Bearer Bonds and 20% Pink Diamond, with no Tequila.
On extra scope-outs before the next reset, those reported chances flip to about 80% Tequila, 10% Ruby Necklace, 8% Bearer Bonds and 2% Pink Diamond. Rockstar publishes no official odds, so treat those figures as community in-game checks, not guarantees.
A low target is not a wasted run. Current payout models report a secondary-loot bonus on repeat runs — largest with Tequila — so a Tequila run with a full cocaine bag still earns solid money.
4. Secondary Targets: Fill One Bag Well
Secondary loot turns a quick vault grab into a full payout. You carry one bag solo, so value per bag space matters more than a single stack’s price.
These are the current per-stack ranges at the time of writing, after secondary values were cut by 10% in Title Update 1.73. Gold pays GTA$295,500 to GTA$300,000 per stack and fills 66.7% of a bag, but compound gold sits behind dual-keycard doors, so a solo player cannot take it legitimately.
Cocaine pays GTA$178,200 to GTA$182,250 per stack and fills 50% of a bag, making two stacks a perfect, full solo bag. Weed pays GTA$117,450 to GTA$121,500 per stack at 37.5% of a bag, and paintings pay GTA$141,750 to GTA$162,000 each at 50% of a bag.
Cash is the filler of last resort at GTA$70,875 to GTA$74,925 per stack and 25% of a bag. Never cross the island for cash while cocaine or weed waits nearby.
Do not forget El Rubio’s office safe on your way to the vault. Current observed values run from GTA$18,000 to GTA$99,000, the cash uses no loot bag space, and a painting can also spawn in that office — usually the fastest half-bag a solo player can collect.
5. Prep Missions: Do the Essentials, Skip the Rest
Do the Kosatka approach vehicle prep, which puts your submarine in position for the drainage tunnel entry. Then do the Cutting Torch prep, because the torch is what opens the drainage grate and locked compound gates quietly.
Your vault tool depends on the target scoped. Most targets sit behind glass and need the Plasma Cutter, while Bearer Bonds need the Safe Code prep instead, so check the planning screen first.
Add the Fingerprint Cloner, which makes the vault hack far more forgiving, and pick a suppressed weapons loadout. Suppressed shots are the difference between a quiet compound and a finale that collapses into a firefight.
Guard clothing and grappling equipment are worth prepping only when your plan uses them. The disruption jobs that weaken guard armour, weapons or air support are for loud approaches, and a stealth solo player can safely skip all three.
6. Approaches, Entry Points and Disguises
The planning screen offers six approach vehicles, including the Kosatka, the Longfin boat and the Velum plane. For solo stealth, the Kosatka approach paired with the drainage tunnel is the reliable default that experienced players repeat.
Other infiltration points, such as the Main Dock, North Dock, West Beach and the airstrip, suit loot-first routes or crews. They put you outside the compound, with more ground and more guards to pass before the vault.
Inside the compound, the drainage tunnel is also the cleanest entry point. You surface inside the walls, close to the office and vault, with no gate check and no vehicle for guards to spot.
Disguises offer a second style of entry. If you scoped guard clothing and collect it in the finale, guards take longer to challenge you, and arriving at the main gate in the supply truck disguised can carry you through.
That front-gate route is slower and riskier solo than the tunnel, so treat disguises as a backup rather than your main plan.
Choose night for a stealth finale. Darkness shortens guard vision, and patience with vision cones will keep the compound quiet.
7. The Solo Finale Route, Step by Step in Principle
Launch with the Kosatka approach, drainage tunnel infiltration and compound entry, and escape set to the Kosatka. Start submerged, swim to the grate, and cut through with the torch while watching its heat.
Inside the compound, move to the office first if it is on your line. Take the safe cash and any office painting, deal carefully with guards crossing the office and vault stairs, and leave bodies out of patrol paths where you can.
Use the fingerprint cloner at the vault, take the primary target, and watch the cutter heat on glass cases. A failed hack costs you the Elite Challenge, so slow down for those few seconds.
Now fill your bag using the loot stop you scoped nearest your exit. One stop is the rule for a clean solo run — chasing tables at the airstrip and both docks burns time and invites detection.
Leave the compound through the main gate once you have the primary target, head for the water by your escape point, and swim away from the island until you are clear. You do not need a dramatic boat chase if nobody has raised the alarm.
If you are spotted, do not panic-loot. Protect the primary target and what is already in your bag, get to the water, and remember that taking damage can cost you secondary loot value.
8. Elite Challenge, Hard Mode and What You Actually Keep
The Elite Challenge has three listed conditions: finish in under 15 minutes, fill every player’s loot bag, and do not fail a fingerprint hack. Solo, your one bag must be completely full.
It pays GTA$50,000 on Normal and GTA$100,000 on Hard Mode, per player, on top of your cut, and it can be earned again on every qualifying run. Using Quick Restart forfeits it, so a run chasing Elite is a run you finish cleanly or abandon.
Hard Mode raises the primary target value by 10%. To arm it, pay the GTA$100,000 setup fee within 48 real minutes of Pavel contacting you after your cooldown ends, because missing that window locks the run to Normal.
Now the deductions. On repeat runs, the fence takes 10% of the gross take and Pavel takes 2%, so 12% comes off before you are paid, and neither fee applies on your very first run.
Worked plainly: a Hard Mode Tequila run with a full cash bag and GTA$50,000 from the safe can gross GTA$838,000. After GTA$83,800 in fencing and GTA$16,760 for Pavel, that leaves GTA$737,440, or GTA$837,440 with Elite, before the setup fee you already paid. Your real levers are a full bag, Elite and Hard Mode, while a Nightclub, an Acid Lab, an Agency or a Bunker can earn in Los Santos between island trips.
9. Cooldowns and How to Plan Your Week
After a solo finale, you wait three in-game days — 144 real minutes. After a crew finale, the wait is one in-game day, or 48 real minutes, the trade-off for sharing the take.
Logging off does not pause that timer, and the target pattern resets with the Thursday weekly reset. Do your first scope-out of the week early, when the reported high-value target chances are strongest.
While Cayo Perico cools down, rotate to other earners rather than idling in a session. That rhythm is what makes the heist a weekly earner instead of a waiting game.
For contrast with the future game, nothing here is confirmed to transfer forward. How Rockstar might handle heists next time is covered in how heists and robberies work in GTA 6, clearly a future-game topic, and the separate question of whether GTA 6 Online will have heists is still unconfirmed, as is what GTA 6 Online actually is beyond official announcements.
10. Common Mistakes That Cost Money
The biggest mistake is scoping lazily. If you never find the drainage tunnel, or launch without knowing where your best loot table is, you have given away your entry advantage and your Elite chance.
Second is bag discipline. Leaving with a half-empty bag throws away the easiest money in the heist, while over-looting across the island gets players spotted and can cost the Elite bonus.
Third is broken preps. Skipping disruption jobs is fine for stealth, but skipping the Cutting Torch, the correct vault tool or a suppressed loadout breaks the stealth plan itself.
Fourth is ignoring the timers. Missing Pavel’s 48-minute Hard Mode window costs you 10% of the primary target, and starting a fresh run the moment the solo cooldown ends, without scoping first, wastes the week’s best target chances.
Finally, do not chase gold solo, and do not look for a replay trick or other exploit to bypass the cooldown or keycard doors. Those routes are not legitimate play, they put an account at risk, and the honest route already pays well.
Frequently Asked Questions
Can you do the Cayo Perico Heist completely solo?
Yes. It was the first GTA Online heist designed to be playable from start to finish by one player, including intel, preps and the finale, although some compound loot, such as gold, still needs a second player.
How much does the Kosatka cost?
The base Kosatka costs GTA$2,200,000 from Warstock Cache & Carry after you meet Miguel Madrazo at The Music Locker. Full customisation can raise the total to GTA$9,085,000, but the base submarine is enough to start.
What is the best primary target in Cayo Perico?
The Panther Statue is worth the most at GTA$1,900,000 at base value, but it is event-only. In the normal rotation, the Pink Diamond is best at GTA$910,000, or GTA$1,001,000 on Hard Mode, at the time of writing.
How much does a solo Cayo Perico run pay?
It depends on the target and your bag. After the fencing fee, Pavel’s cut and the setup fee, a realistic solo run at current values lands roughly between GTA$600,000 and GTA$1,200,000, with Elite adding GTA$50,000 or GTA$100,000.
What are the Cayo Perico cooldowns for solo and group play?
A solo finale triggers a cooldown of three in-game days, or 144 real minutes. A finale completed with a crew triggers one in-game day, or 48 real minutes, before Pavel will let you set up again.
How do you activate Hard Mode on Cayo Perico?
Wait for the cooldown to end and for Pavel to contact you, then pay the GTA$100,000 setup fee within 48 real minutes of that contact. Hard Mode adds 10% to the primary target value and doubles the Elite bonus.
What does Pavel take from a Cayo Perico run?
Pavel takes a 2% cut of the gross take on repeat runs, and the fence takes a further 10%, so 12% is deducted in total. You also pay the GTA$100,000 setup fee up front on each repeat run.
What is the best secondary loot for a solo player?
Cocaine is the best practical solo fill, at GTA$178,200 to GTA$182,250 per stack, with two stacks filling your bag. Gold pays more per bag but sits behind dual-keycard doors that need two players to open legitimately.
What do you need for the Elite Challenge?
Finish the finale in under 15 minutes, fill every loot bag, and do not fail a fingerprint hack. It pays GTA$50,000 on Normal or GTA$100,000 on Hard Mode, and using Quick Restart forfeits it.
Is the Panther Statue always available in Cayo Perico?
No. The Panther Statue only joins the target pool during selected Rockstar events, and outside those events it cannot be found during the scope-out. In a normal week, the Pink Diamond is the top available target.
Final Verdict
Cayo Perico rewards the player who prepares once and repeats a clean routine. Buy the Kosatka, scope the drainage tunnel and one good loot stop, take the target you are given, fill your bag with cocaine when it spawns, and escape quietly under 15 minutes. Values will change again, as they did in July 2026, but that routine is why this heist is still the solo run worth learning properly.