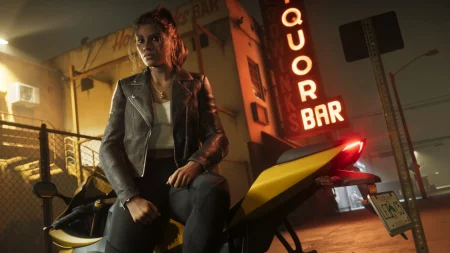

Unwanted Attention Is a Stealth Lesson, a Hotwire Lesson and a Heat Lesson in One Job
Spoiler warning: this walkthrough describes the Chapter 1 mission Unwanted Attention in GTA 6 step by step, including its police chase and its ending. Play it first if you want it unspoiled, and come back if the impound or the escape has you stuck.
Unwanted Attention sends Jason and Cal Hampton to Hamlet to recover a car owed to Brian from the police impound. You sneak over the fence, find a red Phoenix hooked to a tow truck, hotwire it, outrun the police, respray it, deliver it, and then change your clothes so the heat dies down.
Beebom and Sportskeeda both walk through the same job, and its real value is what it teaches: the police scanner Cal installs on your phone, the hotwiring mini-game, and GTA 6’s recognition system. The pay is only $150, but the tools stay with you for the whole game.
Key Takeaways
- Unwanted Attention is a mandatory Chapter 1 mission given by Cal Hampton, found at the ‘C’ marker north of Key Lento after Gone Fishing.
- Cal installs a Police Radio Scanner on Jason’s phone during the drive to Hamlet — a permanent unlock, per Beebom.
- Climb the impound fence rather than breaking it open; Beebom warns breaking in makes the police hyper-aware.
- The target is a red Phoenix sports car at the back of the lot, attached to a tow truck. Unhook it, then hotwire it with the two-stick mini-game.
- Lose the police by leaving their search area, respray the Phoenix, deliver it to the marked garage, and collect the cash from the office inside.
- The final step is buying and changing into new clothes at the nearby gun shop to lower your recognition and end the heat.
- Reward: $150, plus the scanner and the hotwiring practice you will use all game.
Part 1 — Meet Cal and Drive to Hamlet
Open the map after Gone Fishing and look for the ‘C’ marker north of Jason’s house. Sportskeeda places Cal at the beach in the north of Key Lento, fishing; Beebom places the start in the Corsair Keys area north of Key Lento. Ride over and speak to him to start the mission.

Get into the truck with Cal and drive to Hamlet. Sportskeeda puts the impound roughly 1.70 miles away. Cal explains the job on the drive: a payment owed to Brian is sitting in the police impound, in the form of a car, and you are taking it back.
On arrival, a cutscene plays in which Cal installs a police radio scanner on Jason’s phone. Beebom lists the Police Radio Scanner as the mission’s unlocked item. Keep that in mind — it is the most valuable thing you earn here, worth far more than the cash. Our guide to how the smartphone works covers where these apps live on the phone.

Part 2 — Over the Fence and Finding the Phoenix
Approach the impound fence and climb over it. Beebom is explicit that you can break the fence open instead, but doing so makes the police hyper-aware — the stealthy climb is the intended route and costs you nothing.
Stay crouched and move through the lot. Beebom describes jumping over containers to keep a low profile as you cross. The impound is full of parked cars, and Sportskeeda notes you need to search for the right one: the Phoenix is the red sports car at the back of the lot, attached to a tow truck.
Take your time here. There is no timer, the police inside are avoidable, and rushing into the open is the only way this part goes wrong. If you enjoyed the quiet approach, our guide to how to steal cars covers how theft, witnesses and trackers work across the open world.
Part 3 — Unhook and Hotwire the Phoenix
Reach the Phoenix and get into the tow truck first to unhook the car, as Beebom describes. Then get into the Phoenix itself to hotwire it.
The hotwiring mini-game uses both analogue sticks: bring the left and right sticks together toward the marked spot to fill the semicircles on screen, as Beebom explains. Fill them and the engine starts. This same mini-game appears whenever you hotwire vehicles in Leonida, so treat this as your practice run in a controlled setting.
Once it starts, drive slowly toward the main gate and wait for it to open fully. Do not floor it inside the lot. The escape begins the moment you roll out, and you want a clean exit line when it does.
Part 4 — Lose the Cops, Respray and Deliver
As the gate opens and you leave, the police give chase. Drive at full speed and get clear of the search area shown on the minimap — Sportskeeda describes escaping the flashing search zone until officers lose sight of you. Our explainer on how the wanted system works breaks down that search area in detail.
With the chase over, the Pay ‘n’ Spray in Hamlet is marked on your map. Drive the Phoenix in and respray it, changing the body paint so the car is no longer recognised as the impound escapee. Beebom notes this step also repairs the car.
Then deliver the Phoenix to the designated garage. Park it inside, head into the office, and collect the cash waiting there, as Beebom describes. The car is now Brian’s again, and the job is nearly done — one step remains, and it is the one players skip.

Part 5 — Change Your Clothes and Let the Heat Die
Your face, not just the car, is hot. Head to the gun shop next door — Sportskeeda notes it is within walking distance — and buy one of the outfits there. Change into the new clothes to lose the heat.
Sportskeeda adds a useful detail about the recognition system: open the item wheel and check your headwear and glasses, toggling them until their icons turn from red to white, which signals the police are less likely to identify your current appearance. That red-to-white check is worth learning here, in a safe shop, rather than mid-chase later.
Wait for the heat to die down. Cal then messages about the payment: $150, per Beebom. The mission ends, and Pipework is the next job in the chain once the other early missions are done.
Part 6 — Mistakes That Make This Mission Harder
Breaking the fence is the classic error. It works, but Beebom warns it puts the police on high alert, which makes the stealth crossing and the exit both rougher. Climb instead.
The second error is skipping the outfit change or driving off before the heat fades. The mission is teaching recognition on purpose; finishing it properly leaves Jason clean for free-roam, while rushing out half-finished can drag police attention into your next job.
The third is ignoring the scanner. It is easy to treat Cal’s phone install as cutscene flavour, but a police scanner you carry permanently changes how you plan escapes for the rest of the story. Check your phone apps after the mission and learn where it sits.
Frequently Asked Questions
How do you start Unwanted Attention in GTA 6?
After Gone Fishing, find Cal Hampton at the ‘C’ marker north of Key Lento — Sportskeeda places him fishing at the beach — and speak to him. You then drive together to the impound in Hamlet.
What do you unlock in Unwanted Attention?
The Police Radio Scanner on Jason’s phone, installed by Cal during the mission, per Beebom. It is a permanent tool, and the mission’s most valuable reward.
Where is the Phoenix in the impound?
At the back of the lot: a red sports car attached to a tow truck, per Beebom and Sportskeeda. Crouch across the lot and check the rear rows rather than the cars near the gate.
How do you hotwire the Phoenix?
Bring the left and right analogue sticks together toward the marked spot to fill the on-screen semicircles, as Beebom describes. The same two-stick mini-game is used for hotwiring across the game.
Should you break the impound fence or climb it?
Climb it. Beebom warns that breaking the fence open makes the police hyper-aware, while climbing over keeps your approach quiet.
How do you lose the cops in Unwanted Attention?
Leave through the gate once it fully opens, drive fast, and get out of the flashing search area on the minimap until the police lose sight of you, as Sportskeeda describes. Then respray the car as directed.
Why do you change clothes at the end of Unwanted Attention?
To lower Jason’s recognition. Sportskeeda explains that toggling headwear and glasses in the item wheel until their icons turn from red to white makes police less likely to identify him, and buying a new outfit at the gun shop finishes the job.
What is the reward for Unwanted Attention?
$150, per Beebom, plus the permanent Police Radio Scanner unlock. Cal messages Jason about the payment once the heat has died down.
Who gives the Unwanted Attention mission?
Cal Hampton gives it, and you play as Jason. The job recovers a payment owed to Brian Heder from the police impound in Hamlet.
What mission comes after Unwanted Attention?
It is one of the four early Chapter 1 jobs alongside Gear Up, Lab Fees and Just a Scratch. Once all four are complete, Pipework opens.
In, Out and Unrecognised
Unwanted Attention pays pocket change and teaches three of the most useful systems in GTA 6. Climb the fence, learn the hotwire, respect the recognition icons — and this short job will save you from much longer police chases later.