
Gear Up Gives You One Real Decision: Shotgun or Tactical Rifle
Spoiler warning: this walkthrough describes the Chapter 1 mission Gear Up in GTA 6 step by step, including the fight at the end. If you want it unspoiled, play it first — it is short — and come back if the ambush catches you out.
Gear Up is Jason’s first gun-shopping trip. Working for Brian means trouble, so Jason heads to the Ammu-Nation near his house in Key Lento, where Andrew sells him his first longarm. The moment he steps back outside, three Kingfishers are waiting for him.
PowerPyx, GTABase, VGC and Beebom all cover this mission, and they agree on the shape of it: one purchase, one ambush, no lasting consequences either way the fight goes. The detail worth your time is the purchase itself, because the two longarms on offer cost different money and play very differently.
Key Takeaways
- Gear Up opens after Gone Fishing, alongside Lab Fees, Just a Scratch and Unwanted Attention, in any order.
- The shop is Chuck’s Tackle and Shot, an Ammu-Nation near Jason’s house, run by Andrew.
- You must buy a longarm: Beebom lists the Fortune & Son Moreland 850 Shotgun at $350 and the Hawk & Little Mediator Tactical Rifle at $450.
- Jason starts the visit with limited cash — Beebom reports $547 — so most players can only comfortably afford one, plus maybe a small mod.
- Three Kingfishers attack outside the shop with knives and melee combat, per Beebom; GTABase describes them pulling up in a truck.
- Fighting with fists avoids drawing police attention; if you die, you respawn at your house and the mission still completes.
- Neither the gun you pick nor the fight’s outcome changes anything later, per PowerPyx and GTABase.
Part 1 — The Call to Andrew and the Trip to Ammu-Nation
The mission opens with Jason phoning ahead. Beebom describes a call to the gun shop near his house, where Andrew agrees to sort him out with a weapon now that he is working with Brian.
VGC’s walkthrough adds a step players miss: before you leave, check the mailbox outside Jason’s house for cash. Early Chapter 1 payments arrive there because Jason has no bank account yet, and that money can be the difference between the shotgun and the rifle.
Set a waypoint for the Ammu-Nation and drive over in the car parked outside the house. If you are following the story from the start, our prologue walkthrough covers how Jason’s early jobs for Brian lead here.

Part 2 — Buying the Longarm: Prices and the Real Choice
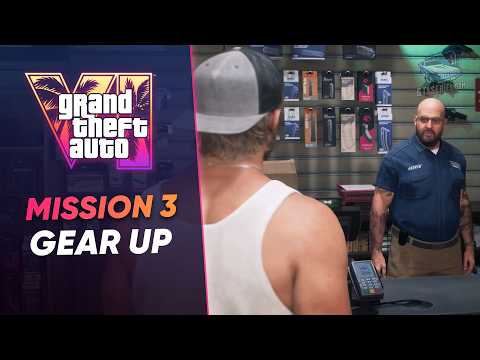
Inside, Andrew is behind the counter in a blue denim shirt and glasses, per Beebom’s description. Talk to him with L2 or LT, then open the shop menu with Triangle or Y. Cycle categories with L1 and R1, or LB and RB, and open the Longarms list.
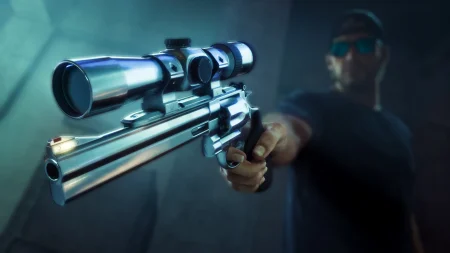
Two weapons carry the mission’s pink marker. The Fortune & Son Moreland 850 Shotgun costs $350. The Hawk & Little Mediator Tactical Rifle costs $450. Beebom reports Jason has $547 at this point, which is why GTABase notes most players will only have enough for the shotgun once everything is counted.
Beebom’s recommendation is the rifle with a 30-round magazine mod, arguing it performs best at mid-to-long range with strong damage per shot. That is a reasonable pick if the mailbox cash topped you up. If money is tight, the shotgun is the honest early-game tool: brutal up close, forgiving to aim, and it leaves change in your pocket.
Either weapon completes the mission. PowerPyx is clear that the choice does not matter for the story, so buy for your playstyle, not out of fear of a wrong answer. For the bigger arsenal picture, see our list of confirmed weapons.
Part 3 — The Kingfishers Ambush Outside
Step outside and the mission turns. Three Kingfishers jump Jason. Beebom describes them charging in with knives for hand-to-hand combat; GTABase describes the gang pulling up in a truck. Either way, you are fighting three men at close range in the car park.
The guides agree on the smart approach: use your fists. Beebom lists the melee inputs — Square or X to punch, X or A to dodge and block — and both Beebom and VGC warn that gunfire raises your heat and can bring a wanted level down on a mission that does not need one. A fist fight keeps the police away far longer.
Use the new longarm only if you are about to go down. One clean melee win also teaches you the brawling rhythm that several Chapter 1 missions quietly rely on later.
If you are struggling with health in fights generally, build the recovery habits early: use cover, eat and drink between fights, and never start a brawl already hurt.

Part 4 — Win or Die, the Mission Ends the Same Way
Beat the three Kingfishers and Jason calls Donnie to warn him about the ambush, which ends the mission. Die instead, and you respawn at your house — and the mission still ends. GTABase and Beebom both confirm there are no lasting consequences to either outcome.
That design is worth understanding, because it is not true of every mission. Gear Up is a systems lesson wearing a story costume: it teaches the gun shop, the longarm category and melee defence, and it refuses to punish you for learning. Do not reload a save over this fight.
Your reward is the longarm itself, which stays in Jason’s inventory. How you carry and store bigger weapons matters from here on, so it is worth reading how weapon storage works before the arsenal grows.
Part 5 — What to Do With the Money Left Over
If you bought the shotgun, you likely have a couple of hundred dollars left. If you bought the rifle and a magazine mod, you are nearly broke. Both positions are fine, but they suggest different next steps.
Cash-poor players should take Lab Fees next: it is one of the four open jobs, it pays, and it teaches the fence and stash loop that funds the early game. Cash-comfortable players can take Unwanted Attention, which pays a smaller amount but unlocks a very useful phone tool.
One more habit to start now: check the mailbox outside Jason’s house whenever you return home. VGC flags it in this mission, and launch guides repeatedly describe early payments landing there rather than in a bank account. Money sitting uncollected in that box is money you cannot spend at Andrew’s counter.
Frequently Asked Questions
How do you unlock Gear Up in GTA 6?
Finish Gone Fishing. Gear Up then opens alongside Lab Fees, Just a Scratch and Unwanted Attention, and the four jobs can be played in any order.
Where is the gun shop in Gear Up?
The Ammu-Nation near Jason’s house in Key Lento, named in Beebom’s guide as Chuck’s Tackle and Shot. Andrew, an old acquaintance of Jason’s, runs the counter.
Shotgun or tactical rifle in Gear Up?
Both complete the mission and PowerPyx confirms the choice changes nothing later. Beebom lists the shotgun at $350 and the rifle at $450, and recommends the rifle with a 30-round magazine mod if you can afford it.
How much money does Jason have in Gear Up?
Beebom reports $547 when he reaches the shop. Check the mailbox outside Jason’s house before you go — VGC notes early mission money arrives there, and it can decide which longarm you can afford.
How do you survive the Kingfishers ambush?
Fight with your fists. Punch with Square or X, and dodge or block with X or A. Beebom and VGC both advise against gunfire because it draws police attention; the three attackers are manageable in melee.
What happens if you die in the Gear Up ambush?
You respawn at Jason’s house and the mission completes anyway. GTABase and Beebom agree there are no lasting consequences to dying in this fight.
Who are the Kingfishers in GTA 6?
A gang Jason crossed during Gone Fishing. Their ambush here is payback, and Arnold’s defection in Hey Arnold! is also linked to that trouble in walkthrough accounts.
What is the reward for Gear Up?
The longarm you bought — it stays in your inventory. There is no separate cash payout reported for the mission itself.
Can you buy both longarms in Gear Up?
Not on the cash Jason normally has. With $547 reported by Beebom, the $350 shotgun and $450 rifle cannot both be bought in this visit. You can return to Ammu-Nation later when you are richer.
What mission should you play after Gear Up?
Any of the other three open jobs. Lab Fees pays best as a next step; Just a Scratch fixes your car for free; Unwanted Attention unlocks the police scanner tool on your phone.
Tooled Up and Moving On
Gear Up is ninety seconds of shopping and one scrappy fight, but it sets your loadout for the whole opening chapter. Take the mailbox money, pick the longarm that suits you, keep your fists up outside — and save the gunfire for missions that actually need it.